
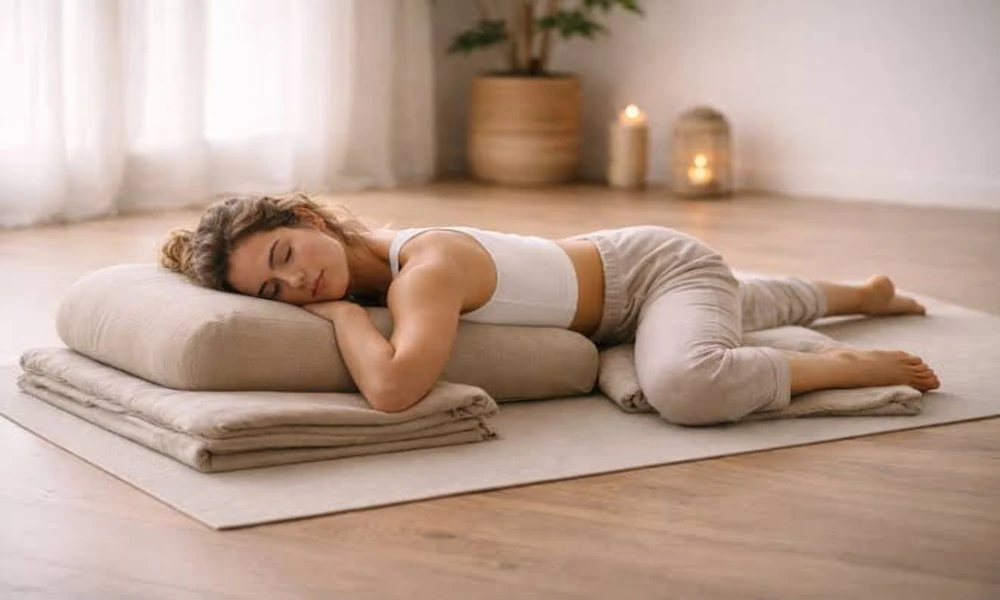
Some days call for movement and activity, while others call for a slower pace. After a demanding workday, a long period of sitting, or a physically tiring week, you may prefer a routine that allows you to pause without putting additional demands on your body. Restorative yoga offers one way to spend that time through supported postures, comfortable positioning, and unhurried breathing.
Unlike exercise routines that focus on strength, endurance, or continuous movement, restorative yoga emphasises settling into supported positions for several minutes. Cushions, folded blankets, and pillows can help reduce unnecessary strain and make the experience more comfortable.
You do not need to be flexible or have previous yoga experience to explore this approach. The most important considerations are choosing suitable positions, allowing your body to feel supported, and avoiding the urge to push beyond your limits.
What Makes Restorative Yoga Different?
Restorative yoga is a gentle practice in which the body is supported by props while you remain in comfortable positions for an extended period. The intention is to reduce the effort needed to maintain a posture and create an opportunity for quiet attention.
A typical session may involve only a handful of poses, with several minutes spent in each one. Movements between positions are usually slow, allowing enough time to arrange cushions or blankets before settling down.
This differs from more active forms of yoga, which may involve repeated transitions, balance challenges, or physically demanding poses.
Restorative practice can be adapted to different experience levels, but individual needs still matter. A position that feels comfortable for one person may cause discomfort for another.
Think of the practice as an opportunity to find supportive positions rather than an exercise in achieving a particular shape.
Gather a Few Everyday Props
You do not need to purchase a complete set of yoga accessories to begin. Items already available at home can provide much of the support required.
Consider preparing the following:
- Pillows: Use them to support your head, knees, or arms.
- Folded blankets: These can cushion the floor and provide warmth.
- A firm cushion: This may help elevate the hips or support the upper body.
- A yoga mat or carpet: A comfortable surface can make floor-based positions easier to maintain.
- A sturdy chair: This offers an alternative when getting down to the floor is difficult.
Before starting, make sure the props are stable and arranged so you will not need to stretch awkwardly to reach them.
Keep a little space around your practice area and use additional support whenever a position feels uncomfortable. Props are not merely decorative; their purpose is to help you settle into a posture without unnecessary strain.
Start With a Supported Resting Position
A supported resting position provides a simple introduction to restorative practice. It allows you to become familiar with the sensation of remaining still while your body is comfortably supported.
Lie on your back on a mat or carpet. Place a pillow beneath your head if needed, and consider positioning a cushion under your knees to reduce tension around the lower back.
Let your arms rest beside your body, with your palms facing upwards or resting comfortably on your abdomen.
Adjust the position until you can remain there without feeling that you need to stretch, brace your muscles, or repeatedly change your posture.
Stay for two to five minutes initially. Allow your breathing to remain natural and notice the support beneath your body.
If lying flat causes discomfort, try resting in a reclined chair instead. You can also bend your knees or change the position of your head and legs.
The aim is to find a comfortable starting point, not to remain in a position that does not suit your body.
Try a Supported Child’s Pose
A supported child’s pose can offer a gentle way to rest the torso while keeping the body close to the floor. However, it is not suitable for everyone, particularly people who experience discomfort in their knees, hips, or ankles.
To try the position, kneel on a comfortable surface with your knees separated as much as feels appropriate. Place a pillow or bolster lengthwise in front of you.
Slowly lean your torso forward and rest it on the support. Turn your head to one side or use an arrangement that allows your neck to remain comfortable. Your arms can rest beside the support or extend forward without strain.
Stay for a short period while breathing normally. If the position places pressure on your knees or makes breathing uncomfortable, come out of it slowly.
You can replace this pose with a seated forward rest at a table, placing your forearms and head on cushions if that arrangement feels more suitable.
The supported version should feel restful rather than like an intense stretch.
Explore restorative yoga With a Supported Reclined Pose
A supported reclined pose can be useful when you want to practise resting without holding your body in an active position. It also provides an opportunity to experiment with cushions and blankets to find a comfortable arrangement.
Sit on the floor with a bolster or firm pillow positioned lengthwise behind you. Slowly lower your upper body onto the support, using your hands to guide the movement.
Place another cushion beneath your head if needed. Let your arms rest naturally beside you, and keep your knees bent or supported with additional pillows if that reduces discomfort.
You should feel supported along your back rather than forced into a deep arch. If your lower back feels strained, lower the height of the support or choose a flatter position.
Remain there for two to five minutes while allowing your breathing to follow its natural rhythm.
If getting onto the floor or lying back is difficult, skip this pose and choose a comfortable reclined chair instead.
Restorative practice is flexible by design. Adjusting the arrangement is part of the process, not a sign that you are doing it incorrectly.
Release Shoulder Tension With a Supported Position
The shoulders and upper back may feel tired after extended periods of typing, driving, or looking at a screen. A supported resting position can help you pause and become more aware of how these areas feel.
Lie on your back or sit in a supportive chair. If lying down, place a thin folded blanket beneath your upper back only if it feels comfortable and does not force your neck into an awkward angle.
Allow your arms to rest at your sides with your palms facing upwards. Keep your shoulders in a natural position rather than pushing them down towards the floor.
Remain there for a few minutes, noticing whether you are holding unnecessary tension in your hands, jaw, or shoulders.
You can make small adjustments whenever needed. Do not force your shoulders into a particular position or attempt to stretch through pain.
This exercise is intended to provide a quiet pause rather than treat a specific shoulder or spinal condition.
7. Use a Supported Legs-Up Position Carefully
Some restorative routines include a position in which the legs rest above the level of the hips. This can be adapted using a wall, a chair, or cushions, depending on your comfort and mobility.
One option is to lie on your back and rest your lower legs on a sturdy chair, with your knees comfortably bent. Place a cushion beneath your head if needed and allow your arms to rest naturally.
Make sure the chair is stable and positioned so your legs do not need to be held in place through muscular effort.
Remain for a few minutes if the position feels comfortable. Avoid it if it causes pain, numbness, pressure, or discomfort.
Not everyone should use elevated-leg positions. If you have circulation problems, a condition affected by changes in leg elevation, recent surgery, or difficulty getting into and out of the position, seek appropriate professional advice first.
You can always choose an ordinary supported resting pose instead. There is no need to include every commonly recommended position in your routine.
Add Gentle Breathing Without Forcing It
Breathing can become a natural part of restorative practice. Rather than using a complicated technique, begin by noticing the rhythm that is already present.
Settle into a supported position and pay attention to the movement of your chest or abdomen. Let each inhalation and exhalation happen without trying to make it unusually deep or slow.
If comfortable, you can mentally notice the words “breathing in” and “breathing out” as you follow each breath. This provides a simple focus when thoughts wander.
Avoid holding your breath or trying to achieve a particular breathing rate. If paying attention to breathing feels uncomfortable, focus on the sensation of the cushion beneath you or the sounds in the room.
A few minutes of quiet attention may be enough. The goal is not to control every physical sensation but to allow yourself to rest in a position that feels safe and manageable.
Create a Short Restorative Routine
You can build a simple session around two or three supported positions instead of attempting a long sequence.
For example, a beginner-friendly routine might include:
- Supported resting position: Spend three minutes lying down or reclining comfortably.
- Supported upper-body rest: Spend three minutes in a suitable reclined position with pillows supporting your back and head.
- Quiet breathing: Finish with two minutes of natural breathing while remaining in a comfortable posture.
This eight-minute example can be adjusted to suit your needs. You can spend less time in each position or omit any pose that causes discomfort.
Move slowly between positions, particularly when getting up from the floor. Roll onto your side before sitting up if that feels more comfortable, and pause before standing.
Practising once or twice a week can be a starting point, although your preferred schedule may differ. Consistency should depend on comfort and practical circumstances rather than a rigid target.
Recognise When to Modify or Stop
Restorative poses are intended to be gentle, but they still need to suit your physical abilities.
Avoid forcing your joints into a particular angle or staying in a position because you believe you must complete the recommended duration. If you feel increasing discomfort, numbness, tingling, dizziness, or difficulty breathing, change position or stop.
If you have a recent injury, have undergone surgery, are pregnant, or have a medical condition that affects movement or positioning, ask a qualified healthcare professional about suitable modifications.
You should also avoid assuming that feeling uncomfortable is necessary for progress. Restorative practice does not depend on pushing through pain.
If a floor-based pose is difficult, use a chair or another supported alternative. If a particular posture does not work for you, leave it out of the routine.
Your comfort and safety are more important than completing a prescribed list of exercises.
Conclusion
Restorative yoga provides a gentle way to include supported rest and mindful breathing in your daily routine. With a few pillows, a comfortable surface, and a small selection of suitable poses, you can create a practice that does not require advanced flexibility or demanding movements.
Begin with one supported position and remain there for a few minutes. Adjust the props, notice your comfort, and gradually explore other poses if they suit your needs.
A consistent yoga routine does not always need to involve vigorous movement. Sometimes, setting aside time to rest comfortably and pay attention to your body can be a valuable part of maintaining a balanced approach to everyday activity.
Frequently Asked Questions
1. Is restorative yoga suitable for beginners?
Yes. Many restorative poses can be adapted for beginners using pillows, blankets, or chairs. Start with simple supported positions and avoid any movement that causes discomfort.
2. How long should I hold a restorative yoga pose?
Beginners can start with two to five minutes in a comfortable position. You can adjust the duration according to your needs and stop whenever the pose becomes uncomfortable.
3. Do I need special equipment for restorative yoga?
No. Household pillows, folded blankets, and a stable chair can provide useful support. A yoga mat is optional if you already have a comfortable surface.
4. Can restorative yoga help with relaxation?
Many people find supported poses and quiet breathing relaxing. Individual experiences vary, and restorative yoga should not be considered a guaranteed treatment for stress, pain, or medical conditions.
5. What is the difference between restorative yoga and regular yoga?
Restorative yoga emphasises supported positions, minimal effort, and extended periods of rest. Other yoga styles may involve more movement, strength, balance, or active stretching. Both can be adapted to different needs and abilities.